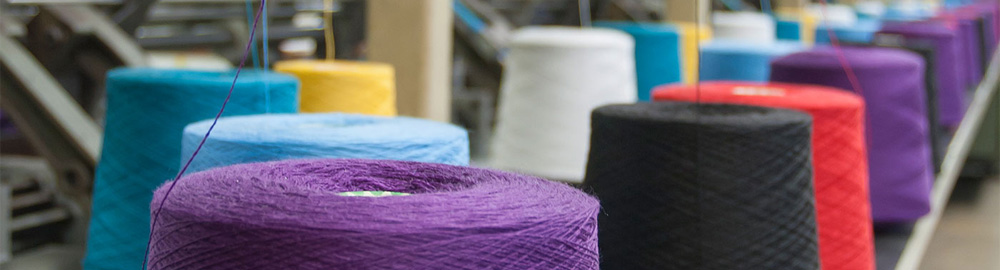


- Qinsun Instruments Co., Ltd.
- Tell:+86-21-6780 0179
- Phone:+86-17740808215
- Address:No. 2578 Minhang District Gu Dai Road, Shanghai
- Contact:Mr. Li
- QQ:846490659
ASTM D5034-95 breaking strength of fabric and elongation test (sample grabbing method)
ASTM D5034-95
Breaking Strength of Fabric and Elongation Test (Grip Method)
1. Scope
1-1 This method specifies the breaking strength and elongation of textiles by the grab or modified grab method. The test may also be performed with the sample wet.
1-1-1 The grab method can be used to test woven, woolen, or shrunken fabrics, while the modified grab method is primarily used to test woven fabrics.
1-2 This method is not recommended for glass fiber fabrics, knit fabrics or other high elasticity fabrics (over 11%).
Note 1: For the determination of breaking strength and elongation of textiles by the ripped selvedge yarn or cut strip method, please refer to ASTM D5035.
1-3 This method is available in two units: inch-pounds and SI. U.S. customers generally use inch-pounds as the unit, while international standards generally use metric SI as the unit. Different units are used in different standards. Such different units are not equivalent.
1-4 This standard does not cover the introduction of **. However, it is hoped that some document management related to **hygiene should be established before operating this standard.
2. References
2-1 ASTM D76 Description of Textile Tensile Strength Machines;
2-2 ASTM D123 Terminology Related to Textiles;
2-3 ASTM D629 Method of Quantitative Analysis of Textiles;
2-4 ASTM D1059 Method for Testing Yarn Counts of Short Segments;
2-5 ASTM D1776 Moisturization for Textile Testing;
2-6 ASTM D5035 Breaking Strength of Fabric and Elongation Testing (Strip Method).
3. Terminology
3-1 Definitions
3-1-1 Breaking Strength-The *high* force recorded when a specimen is pulled apart.
3-1-1-1 For more crumbly and hard raw materials, a *maximum* force is generally obtained at break. In the case of softer materials, the force value may be obtained before fracture.
3-1-2 Fracture Load - This term is not generally used, but is now commonly referred to as Fracture Strength.
3-1-3 CRE TENSILE STRENGTH MACHINE: A test instrument that utilizes a uniform test speed.
3-1-4 CRL Tensile Strength Machine: An instrument in which the load is increased uniformly 3 seconds after the instrument is started.
3-1-5 CRT Tensile Strength Machine: An isotonic traction tester in which one collet moves at an equal rate of speed and a load is applied by a collet driving a weight mechanism so that the force and elongation of the specimen increases in proportion to the tensile properties of the specimen.
3-1-6 Elongation: The ratio of the elongation of a specimen to its original length expressed as a percentage.
3-1-7 Elongation: The increase in length of a specimen due to tension.
3-1-8 gripping method: A fabric tensile test in which the specimen is gripped at the center of its width.
3-1-8-1 For example, if the width of the sample is 100 mm (4 in) and the width of the gripper is 25 mm (1 in), then the center 25 mm of the sample is gripped, but the width is not gripped beyond 37.5 mm (1.5 in) from the edge on either side.
3-1-9 Modified Grip Method: Based on the Grip Method of sampling, the long side of the sample is cut 37.5 mm (1.5 in) inward from each edge at the center.
3-1-9-1 The purpose of this cut is primarily to prevent the influence of selvedge yarns outside of the gripping area on strength pulling in the Grip Test.
3-1-10 Tensile Strength Test: To determine the tensile-elongation properties, breaking strength, and elongation at break of textiles.
3-1-11 Refer to ASTM D123 for other terms used in this test.
4. Principles
4-1 A 100 mm (4 inch) wide specimen is clamped in the center of the clamp of the tensile strength machine and the instrument is started until the specimen breaks. The test results (breaking force and elongation at break) can be read directly from the machine instrument, from the load-extension curve, or from a computer when connected to the machine.
4-2 This method utilizes two test specimens (G - Grip Method and MG - Modified Grip Method) and three test instruments (CRE, CRL, CRT). This can be combined to form a test system for six cases: G-CRE, G-CRL, G-CRT, MG-CRE, MG-CRL, and MG-CRT.
5. Significance and Practicality
5-1-1 The Grab Sample Method is widely used commercially to test most woven or nonwoven fabrics. The Modified Grab Sample Method, which is primarily used to test woven fabrics, is also widely used commercially.
5-1-1 In the event of a commercial dispute over the results of a test, the buyer and seller should make comparative tests to determine the differences between the two laboratories, and it is advisable to use an authoritative organization to make the comparisons. At the same time, the samples chosen by the two parties should ensure consistency, the general practice is that the two parties to adopt a random sampling approach in order to find out the entire level of the situation. Once found that the two parties have differences, should be corrected as soon as possible to harmonize, or must explain to the other party the reasons for the difference in results.
5-2 Since knitted fabrics are too elastic, this method is not recommended.
5-3 For varieties with high strength (>200 N / cm or 1140 lbs / inch), it is recommended that this method be corrected for some parameters to be tested later, but special attention should be paid during the test.
5-4 This method can determine the dry and wet state of the fabric.
5-5 Strength data obtained with different types of instruments are not comparable. When it is necessary to compare the results of different types of instruments, the instruments should be adjusted as much as possible so that the breaking time is between 20±3 seconds, otherwise the test results may be very different.
5-6 It is preferred that this method be tested using an isokinetic elongation system, but in the event of a dispute, the test speed may be adjusted so that the time of rupture of the specimen is controlled to be between 20±3 seconds, if possible.
5-7 This method can also determine the effective strength of the fabric, that is to say, the breaking strength of the specimen includes the auxiliary strength of the yarn next to the clamping area, so that the breaking strength of the fabric is not only a reflection of the strength of the yarn at the clamping area of the specimen. The gripper method is convenient and quick in taking samples, but it requires more test fabrics, and the results of the strip method and the gripper method cannot be simply converted to each other because different types of fabrics affect their tensile properties.
5-8 In the strip method, it is usually necessary to pull the selvedge yarn and then test, but some fabrics are easy to be further scattered after stress, so it is better to use the modified grab method. This method is especially suitable for the determination of some high strength fabrics. 6.
6. Instrumentation, reagents, raw materials
6-1 ASTM D76 in line with the provisions of the CRE, CRL or CRT type of strength meter, these instruments must have a certain range of measurement, can display the breaking strength, elongation, can be set to 30 0 ± 10 mm / min (12 ± 0.5 inch / min), or its speed can be adjusted, or can be controlled to test the time of breakage between 20 ± 3 seconds.
6-2 Clamps: The clamping surface of the collet is usually metal or other negotiated raw material. Its clamping surface must be flat, in the iron fixture clamping samples, in order to prevent damage to the fabric, and generally affixed a layer of rubber. Before and after the two clamping surface must be parallel, the center line of the upper and lower two clamping surface should be consistent with the direction of force.
6-2-1 grab sample method, the front clamp surface width perpendicular to the direction of force is generally 25 ± 1 mm (1 ± 0.02 inch), parallel to the direction of force should be greater than the width of 25 mm, but must be less than 50 mm, the rear clamp surface width to ensure that the specimen is matched under the premise of as wide as possible, in general, the larger the rear clamp is the front and back of the clamp is easier to match well.
Note 2: the size of the front (upper) clamp surface size of 25 * 50 mm (1.0 * 2.0inch) and 25 * 25 mm (1.0 * 1.0inch) the sample measured results are different. For many fabrics, a front upper jaw size of 25*50mm is effective in minimizing specimen slippage and allowing for tighter clamping of the sample. Regardless of the size of the gripper face used, it must be noted in the report (but in current test houses, such as ITS, SGS, etc., the typical front gripper size is 25.4*25.4mm).
6-2-2 Modified Grip Sample Method The front upper clamp is 25*50mm (1.0*2.0inch) or larger and the long side of the clamp is parallel to the direction of the force, and the rear clamp is 50*50mm (2.0*2.0inch) or larger.
6-3 6-3 Auxiliary metal clamp block, weighing about 170g (60Z) and not less than 100mm wide;
6-4 6-4 Deionized water for immersion testing;
6-5 Non-ionic wetting agent for the immersion test;
6-6 Containers for wetting samples (beakers can be used instead);
6-7 Standard test cloth for calibration instruments;
6-8 Two stainless steel rods 125 mm (5 inches) long and 10 mm (3/8 inch) in diameter.
7. Sampling
7-1 Batch sampling: randomly take the required number of samples according to the following sampling rules
Number of rolls/pieces per large batch Number of rolls/pieces of test samples taken
1-3 All tested
4-24 4
25-50 50
>50 Approximately 10% up to a maximum of 10 rolls/pcs.
Note 3: In the number of samples to be taken and in its principles, the buyer and seller should take into account the differences in quality from roll to roll and within the same roll of fabric in order to rationalize sampling while minimizing the risk to the buyer and seller and ensuring quality.
7-2 Laboratory Sampling: A one-yard sample of the entire width of each roll of fabric in the lot shall be taken as a test sample.
Note 4: If a palm-sized piece (meaning the fabric is very small) is taken for testing, it is only representative of the quality of the piece, not the quality of the roll or lot, which suggests that the sample should be as large as possible.
7-3 Test samples: Each test sample is generally selected from 5 pieces of warp direction and 8 pieces of weft direction.
7-3-1 Tests include the following:
7-3-1-1 Testing of warp strength under standard conditions (meaning under constant humidity and moisture);
7-3-1-2 Tests of warp strength on specimens in the wet condition at 21°C;
7-3-1-3 Tests for weft strength under standard conditions;
7-3-1-4 Tests of weft strength on wet specimens at 21℃.
7-3-2 For determination of isokinetic breaking strength or for fabrics for which the breaking condition is not known, an additional 2-3 sets of samples must be pre-tested to determine the appropriate test speed.
8. Humidification
8-1 Moisture conditioning test under standard conditions (refers to constant temperature and humidity).
8-1-1 If the actual moisture regain of the specimen is higher than the standard moisture regain (we used to call it nominal moisture regain), it is recommended that the specimen be pre-conditioned in accordance with ASTM D1776.
8-1-2 The specimen will be placed in accordance with the provisions of ASTM D1776 environment humidification (temperature 21 ± 1 ℃, relative humidity 65 ± 2%), generally considered within 2 hours, when the weight of the specimen does not increase by more than 0.1%, it can be regarded as sufficiently humidified, and you can start testing.
Note 5: In the actual test, whether the specimen is sufficiently humidified is generally not whether the weight change as a reference. In addition, if the specified time to wetting and the dispute, you can wet a period of time, so that the specimen in the test before the full wetting, the following is the recommended wetting time of some fibers:
Fibers Minimum wetting time
Animal fibers (e.g. wool, recycled protein fibers) 8 hours
Cellulosic fibers (e.g. cotton) 6 hours
Viscose 8 hours
Acetate fibers 4 hours
Fibers with less than 5% moisture regain at 65% relative humidity 2 hours
The above reference time is an approximate figure obtained by placing a single-layer sample in a well-dispersed manner under standard conditions. Heavier fabrics will generally require longer dampening times. If the fabric contains more than two fiber components, the longer time should be the longer time required for wetting.
8-2 Wet Specimen Test
At room temperature, immerse the specimen in deionized water until it is completely wet. In order to wet the specimen more fully, add a non-ionic wetting agent of not more than 0.05% to the deionized water. After the specimen is completely wetted and removed from the water, the sample should be measured as soon as possible and within 2 minutes.
Note 6: The specimen should be immersed in water as completely as possible until the wet breaking strength of the specimen is stabilized. To prevent unnecessary controversy, it is recommended that a wetting time of 1 hour be specified.
8-2-2 Special care must be taken in testing because the specimen may not be uniformly wetted due to the presence of gums, coatings, or water-repellent additives in the specimen.
8-2-3 If wet strength is required to be tested without gums or water repellents, remove the gums, water repellents, etc., before testing, using appropriate methods in accordance with ASTM D629, but without affecting the normal strength of the fabric.
9. Sample Preparation
9-1 General
9-1-1 Cut the long side of the sample parallel to the test direction (warp or weft), or both directions of the sample, in practice, generally warp and weft need to be sampled for testing. Special attention should be paid to the samples taken should be diagonal as far as possible, to ensure that all samples do not contain the same warp or weft yarns. In addition, weft sampling should be separated by as large a distance as possible. When sampling in the warp and weft directions, avoid the edges of the fabric as much as possible and ensure that the samples are taken one-tenth of the way from the edge of the fabric.
9-2 Grab sample method (G)
9-2-1 Cut the specimen to 100*150mm (4±0.05*6 inch) with the long side parallel to the test direction (warp or weft).
Note 7: The length of the specimen should depend on the type of clamp. In addition, the specimen should be long enough to ensure that the ends of the specimen protrude from the collet jaws by at least 10 mm (0.5 inch). The specimen length can be calculated according to the following formula:
Specimen length (mm) = spacing (75mm) + protrusion of the clamp ends (20mm) + 2 * width of the clamp in the direction of force (mm)
The general width of the clamp for the sample grabbing method is not less than 25mm, so the sample length should be: 75+20+2*25=145mm.
9-2-2 Draw a line 37±1mm (1.5±0.02inch) from the long side as the marking line of the clamped specimen.
9-3 Modified Gripping Method (MG)
9-3-1 Clip the modified grip method specimen as described in 9-2-1 and 9-2-2.
9-3-1-1 For fabrics with very high strength take a specimen generally with a length of not less than 400mm (16.0inch) on the long side and make a good marking line according to the method of 9-2-2.
9-3-2 Cut 2 notches along the center of the specimen on both sides according to the description in 3-1-9-1, see the diagram of the specimen for the modified grip method.
9-3-2-1 When the specimen has fewer than 25 yarns per inch, cut the notches in such a way that the number of yarns to the *approximation of one inch is not cut off as far as possible.
9-4 When it is necessary to determine the strength under wet conditions in addition to the strength under standard conditions conditioned wet, double the number of specimens for the test. In order to facilitate the comparison of results, the sample can be taken twice the length of the long side of the specimen, and then divided into two, half of which can be used to do the test under the standard conditioned moisture, and the other half can be used to determine the strength under the wet state.
Note 8: When some specimens in the soaking will shrink more, it must be noted that the sample should be slightly longer. 10.
10. Instrument Preparation and Calibration
10-1 Tensile strength machine
10-1-1 Prepare the instrument according to the manufacturer's operation and the instructions in 10-1-2 through 10-1-4.
10-1-2 Set the effective distance (spacing) between two clamps to 75±1mm (3.0±0.05inch).
10-1-3 Select the instrument test range to calibrate the instrument between 10% and 90% of full scale.
10-1-4 Select an instrument test speed of 300±10mm/min (12±0.5inch/min) unless otherwise specified.
10-2 Collet Requirements
10-2-1 Check that the jaws are level and that the front and rear jaws are parallel.
10-2-2 Wrap two layers of copy paper with two layers of thin paper to form a four-ply paper sample for the sandwich cake sample.
10-2-3 Hold the sandwich paper sample between the front and rear jaws under normal air pressure.
10-2-4 Remove the sandwich paper sample and check to see if the clamp marks on the thin paper are uniform and consistent.
10-2-5 If the marks are irregular (generally 25.4*25.4mm square), adjust the clamp and reconfirm.
Note 9: Irregular marks may be caused by impurities on the surface of the clamp.
10-3 Calibration of the entire instrument operating system
10-3-1 Calibrate the performance of the Instrument (including the transducer, elongation, gripper system, and test data collection system) with a standard piece of fabric for which the breaking strength and elongation data are known. These calibrations are recommended to be performed weekly. In addition, the Instrument must be calibrated once the holder system or sensor has been changed.
10-3-2 Select the range of the instrument based on the breaking strength and elongation properties of the standard fabric.
10-3-3 Prepare test specimens of standard fabrics according to the conditions described in 9.
10-3-4 Select the appropriate air pressure and clamp the specimen, draw a straight line between the specimen and the intersection of the clamp and start the instrument to see if there is any sliding of the clamped specimen, and if there is any sliding of the specimen, adjust the pressure of the clamp upward. If the air pressure is adjusted to * high and the specimen still can not be clamped, add a pad on the clamp or the specimen clamping place for coating to prevent the specimen from slipping.
10-3-5 Perform the Standard Fabric Test in accordance with Test Procedure 11.
10-3-6 Calculate the breaking strength and elongation of the standard fabric and calculate its standard deviation.
10-3-7 Compare the data with previous results for the standard fabric. If the differences are outside the allowable range, reset the machine to find the differences.
11. test procedure
11-1 Clamp the sample between the upper and lower jaws along the clamping specimen marking line, making sure that the clamping direction and the direction of force are the same so that the force on the specimen is uniform.
11-1-1 For some very high strength fabrics, it is generally difficult to clamp firmly according to the above method, in order to prevent slipping, you can add an auxiliary steel bar on each end of the sample, and at the same time, pay attention to the force of the air clamp should not be too large, or else it will be easy to cause sample breakage in the front clamp, but the air clamp should not be too loose, or else it will cause the sample to slide.
11-2 The elongation of the specimen is related to the spacing. If the elongation of the specimen is to be tested, the specimen should be uniformly pre-tensioned before clamping, so as to allow the specimen to have a certain degree of elongation, but the elongation rate should not be more than 0.05%.
11-2-1 An auxiliary metal clamp may be clamped to the end of the specimen to provide a uniform pre-tensioning, and the auxiliary metal clamp may be removed after the specimen is uniformly clamped.
11-3 A line may be drawn across the specimen at the intersection of the specimen and the clamp to check for specimen slippage during the test. If the specimen slips, there will be a distance between the line and the clamp.
11-4 Start the instrument and pull off the specimen.
11-5 Record the breaking strength in the warp and weft directions and, if desired, the elongation of the specimen.
11-5-1 Some instruments are connected to a computer and the data can be read on the computer.
11-6 If a specimen slips, breaks near the jaws, or for any other reason, the result is significantly lower than the average result for the specimen, the data should be discarded and a new specimen should be taken and the test continued to obtain the required number of average breaking strengths.
NOTE 10: Discarding of data shall be based on the condition of the specimen itself and the observed fracture of the specimen. Data should be discarded if there are other provisions for discard, such as breakage within 5 mm of the nip or results below 50% of the average, but data from other cases should not be discarded unless a problem is recognized.
11-7 If fabric slips around the collet or if more than 25% of the specimens break within 5 mm of the collet, the test parameters should be modified according to the following principles, and the specifics of the modification should be noted when the modification is made.
11-7-1 The jaws may be padded.
11-7-2 Coating may be applied to the specimen holders.
11-7-3 The clamp face may be trimmed.
NOTE 11: It is generally difficult to accurately analyze the cause of specimen breakage in the vicinity of the clamp. If the specimen breaks due to the clamp, this data should be discarded. If the fracture near the clamp is due to a random distribution of weaknesses in the specimen, these data should not be discarded. Some fractures near the jaws are due to the clamping relationship, so that when the specimen is stretched, the specimen shrinks in the vicinity of the jaws and the relative pressure increases, thus making it easier to fracture. Fracture in this case is unavoidable and should be a characteristic of this type of test, as it is often seen in gripping tests.
11-8 The width of the short edge of a specimen subjected to shrinkage by the wet method of testing shall be determined by the condition of the specimen after it has dried, as shown in ASTM D1059.
12. Calculations
12-1 Fracture strength, i.e., the instrument shows the * large load and considered normal results to be averaged.
12-2 The elongation (%) of the specimen can be measured at different stresses, e.g., breaking strength. The original length of the specimen for calculation is generally the spacing (75 mm).
12-2-1 This method calculates the elongation of a specimen in each case, such as the elongation at the breaking strength or at other force values.
12-3 Correction of Specimen Strength at Breaking in Wet State:
12-3-1 In the grab sample method of immersion specimen testing, for varieties in which there is shrinkage of the specimen, the breaking strength can be corrected according to the following formula in order to compensate for it:
S = L * C / W
S: Corrected value of the breaking strength of the specimen in the wet state;
L: breaking strength in the wet state;
C: The number of yarns (which can be considered as density) at constant temperature and humidity;
W: number of yarns at constant temperature and humidity (can be considered as density).
12-3-2 The breaking strength of the specimen should be corrected for shrinkage due to soaking.
13. Reporting
13-1 Indicate test method ASTM D5034, sample description, and sampling method.
13-2 The following information is required for each experimental test report:
13-2-1 Average breaking strength;
13-2-2 Report average elongation at break, if required;
13-2-3 Number of samples taken;
13-2-4 Type of machine;
13-2-5 The *maximum* value of breaking strength;
13-2-6 Pre-applied tension;
13-2-7 Size of clamp;
13-2-8 The type of clamp pads, whether the specimen is trimmed at the clamping area, or whether the clamping surface is trimmed (in the case of anti-slip).
13-2-9 If there are fewer than 25 yarns in the specimen clamping area, show the number of yarns.
13-2-10 List average break time, if required.
13-2-11 If required, list test results under both constant temperature and humidity and immersion conditions.
13-2-12 If the wet state test method is used, is the shrinkage within the allowable range.
13-2-13 If the shrinkage is out of the allowable range, whether the results are corrected and the specific procedure for doing so.
14. Accuracy and Bias
15. Keywords
15-1 Strength at break, elongation, fabrics, nonwovens, woven fabrics.